body { background:#fff url("http://www.blogblog.com/dots/bg_dots.gif") 50% 0; margin:0; padding:0 10px; text-align:center; font:x-small Verdana,Arial,Sans-serif; color:#333; font-size/* */:/**/small; font-size: /**/small; } /* Page Structure ----------------------------------------------- */ @media all { #content { background:url("http://www.blogblog.com/dots/bg_3dots.gif") no-repeat 250px 50px; width:700px; margin:0 auto; padding:50px 0; text-align:left; } #main { width:450px; float:right; padding:50px 0 20px; font-size:85%; } #main2 { background:url("http://www.blogblog.com/dots/bg_dots2.gif") -100px -100px; padding:20px 10px 15px; } #sidebar { width:200px; float:left; font-size:85%; padding-bottom:20px; } #sidebar2 { background:url("http://www.blogblog.com/dots/bg_dots2.gif") 150px -50px; padding:5px 10px 15px; width:200px; width/* */:/**/180px; width: /**/180px; } } @media handheld { #content { width:90%; } #main { width:100%; float:none; } #sidebar { width:100%; float:none; } #sidebar2 { width:100%; } } html>body #main, html>body #sidebar { /* We only give this fade from white to nothing to browsers that can handle 24-bit transparent PNGs */ background/* */:/**/url("http://www.blogblog.com/dots/bg_white_fade.png") repeat-x left bottom; } /* Title & Description ----------------------------------------------- */ @media all { #blog-title { margin:0 0 .5em; font:250%/1.4em Georgia,Serif; color:#353; } #blog-title a { color:#353; text-decoration:none; } #description { margin:0 0 1.75em; color:#996; } #blog-mobile-title { display:none; } #description-mobile { display:none; } } @media handheld { #blog-title { display:none; } #description { display:none; } #blog-mobile-title { display:block; margin:0 0 .5em; font:250%/1.4em Georgia,Serif; color:#353; } #blog-mobile-title a { color:#353; text-decoration:none; } #description-mobile { display:block; margin:0 0 1.75em; color:#996; } } /* Links ----------------------------------------------- */ a:link { color:#488; } a:visited { color:#885; } a:hover { color:#000; } a img { border-width:0; } /* Posts ----------------------------------------------- */ .date-header { margin:0 0 .75em; padding-bottom:.35em; border-bottom:1px dotted #9b9; font:95%/1.4em Georgia,Serif; text-transform:uppercase; letter-spacing:.3em; color:#663; } .post { margin:0 0 2.5em; line-height:1.6em; } .post-title { margin:.25em 0; font:bold 130%/1.4em Georgia,Serif; color:#333; } .post-title a, .post-title strong { background:url("http://www.blogblog.com/dots/bg_post_title.gif") no-repeat 0 .25em; display:block; color:#333; text-decoration:none; padding:0 0 1px 45px; } .post-title a:hover { color:#000; } .post p { margin:0 0 .75em; } p.post-footer { margin:0; text-align:right; } p.post-footer em { display:block; float:left; text-align:left; font-style:normal; color:#996; } a.comment-link { /* IE5.0/Win doesn't apply padding to inline elements, so we hide these two declarations from it */ background/* */:/**/url("http://www.blogblog.com/dots/icon_comment.gif") no-repeat 0 .25em; padding-left:15px; } html>body a.comment-link { /* Respecified, for IE5/Mac's benefit */ background:url("http://www.blogblog.com/dots/icon_comment.gif") no-repeat 0 .25em; padding-left:15px; } .post img { margin:0 0 5px 0; padding:4px; border:1px solid #cca; } /* Comments ----------------------------------------------- */ #comments { margin:0; } #comments h4 { margin:0 0 10px; border-top:1px dotted #9b9; padding-top:.5em; font:bold 110%/1.4em Georgia,Serif; color:#333; } #comments-block { line-height:1.6em; } .comment-poster { background:url("http://www.blogblog.com/dots/icon_comment.gif") no-repeat 2px .35em; margin:.5em 0 0; padding:0 0 0 20px; font-weight:bold; } .comment-body { margin:0; padding:0 0 0 20px; } .comment-body p { margin:0 0 .5em; } .comment-timestamp { margin:0 0 .5em; padding:0 0 .75em 20px; color:#996; } .comment-timestamp a:link { color:#996; } .deleted-comment { font-style:italic; color:gray; } .paging-control-container { float: right; margin: 0px 6px 0px 0px; font-size: 80%; } .unneeded-paging-control { visibility: hidden; } /* More Sidebar Content ----------------------------------------------- */ .sidebar-title { margin:2em 0 .75em; padding-bottom:.35em; border-bottom:1px dotted #9b9; font:95%/1.4em Georgia,Serif; text-transform:uppercase; letter-spacing:.3em; color:#663; } #sidebar p { margin:0 0 .75em; line-height:1.6em; } #sidebar ul { margin:.5em 0 1em; padding:0 0px; list-style:none; line-height:1.5em; } #sidebar ul li { background:url("http://www.blogblog.com/dots/bullet.gif") no-repeat 3px .45em; margin:0; padding:0 0 5px 15px; } #sidebar p { margin:0 0 .6em; } /* Profile ----------------------------------------------- */ .profile-datablock { margin:0 0 1em; } .profile-img { display:inline; } .profile-img img { float:left; margin:0 8px 5px 0; border:4px solid #cc9; } .profile-data { margin:0; line-height:1.5em; } .profile-data strong { display:block; } .profile-textblock { clear:left; } /* Footer ----------------------------------------------- */ #footer { clear:both; padding:15px 0 0; } #footer hr { display:none; } #footer p { margin:0; } /* Feeds ----------------------------------------------- */ #blogfeeds { } #postfeeds { padding-left: 20px }

Prudent Baby

Get sewing how to, sewing tutorials, and sewing help to learn sewing. We offer sewing tutorial for sewing moms.

Wednesday, October 19, 2011

How to Make Tea Cup Candles


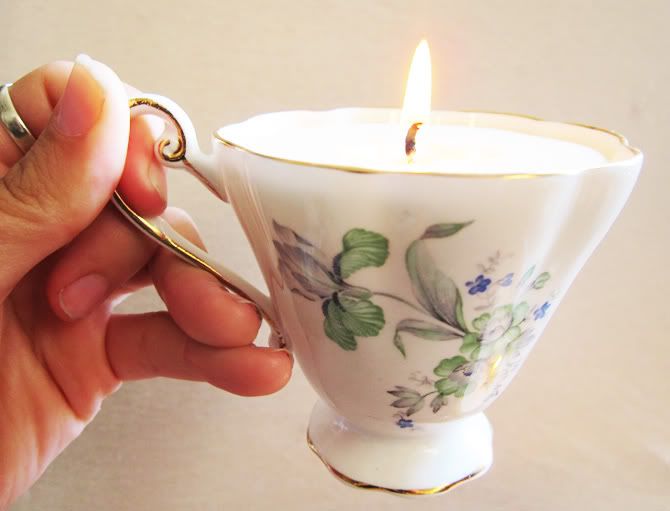
Almost two years ago now we took our first try at making Soy candles in baby food jars. Today we will take it a step further by making soy candles in beautiful and unique tea cups. With Christmas quickly approaching these are perfect to give as a gift or use as party favors. You could even make them inside coffee mugs for those manlier guests. It's way easier than you think...

Find out how to make tea cup candles after the jump...
How to Make a Tea Cup Candle

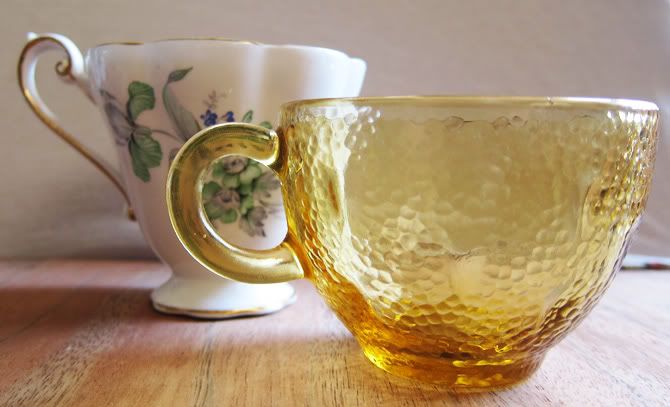
Depending on where you go tea cups can be very expensive. Flea markets and thrift stores seem to be the places to find the cheapest deals. I bought these two beauties for $2 at our nearest flea market.

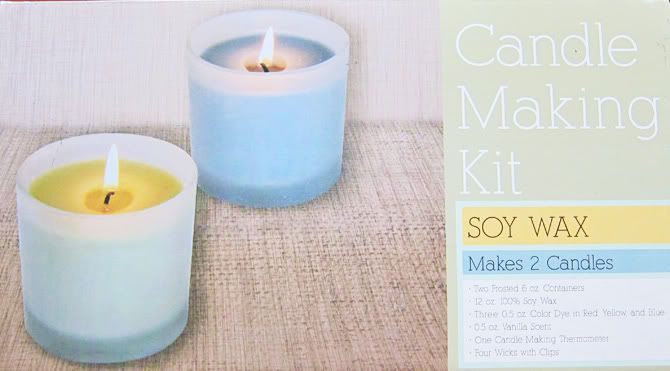
There are two options when starting to make candles. You can buy the supplies individually or in a kit. In this case I bought this kit from Michaels however, it looks like Michaels is the only place you can buy it since it is nowhere to be found online. I will also add in helpful links for buying supplies individually.

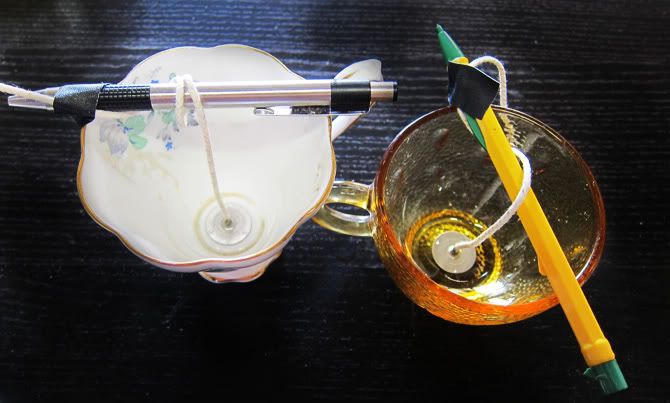
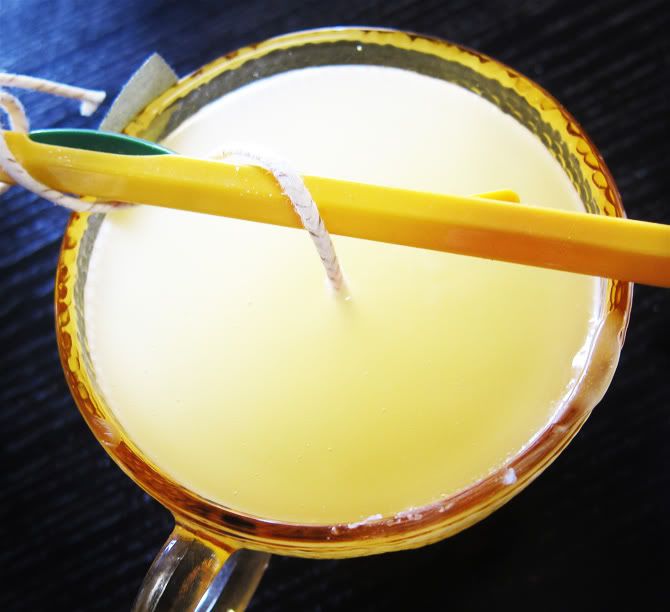
Hot glue your wicks to the bottom of the cups. I wrapped the rest of the wick around a pencil and pen but any stick will work. This helps keep the wick centered when pouring in the wax.

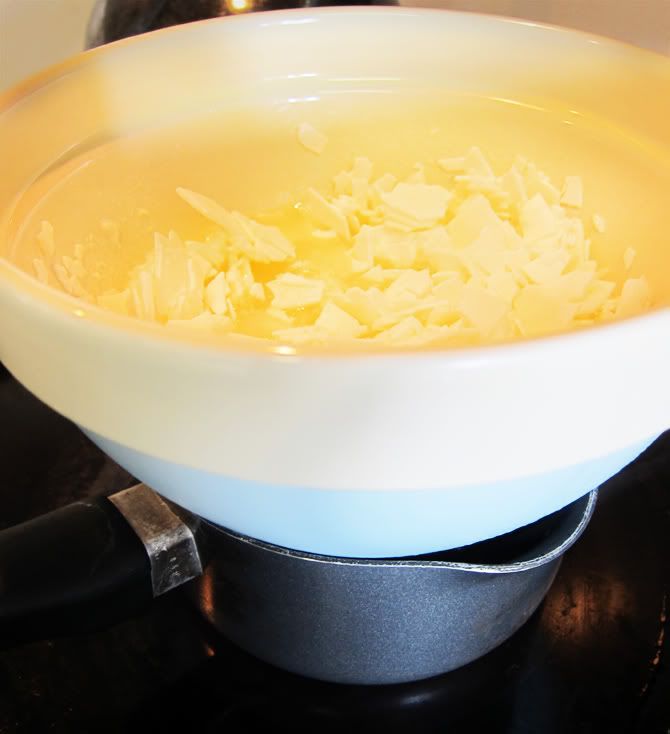
I did not have a double boiler so I made my own homemade one. I put about 2 inches of water into a pot and set it to low. Then I put the wax inside the bowl and placed it on top.

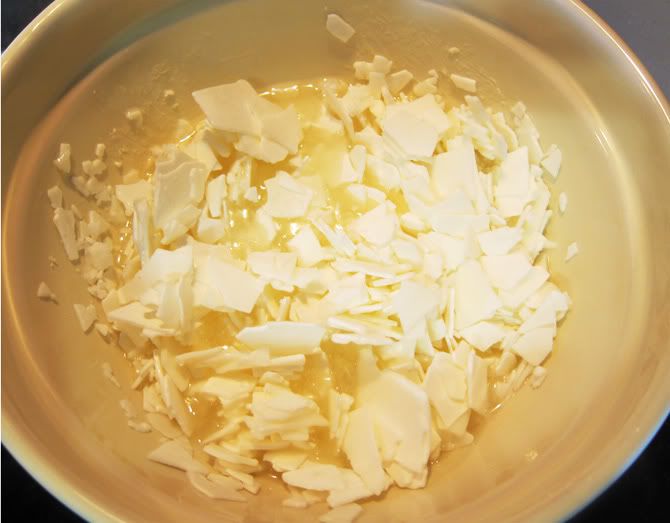
Gradually melt the wax, adjusting the stove temperature if needed. I increased mine to Medium heat.

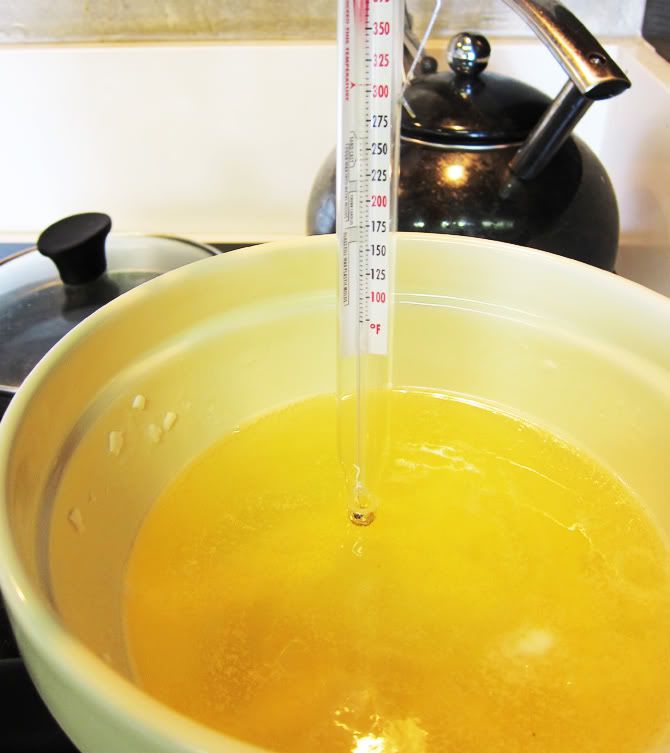
Melt the wax until it reaches the temperature specified on the bag. In this case I heated it to 180 degrees Fahrenheit. This is the point where you can add the scent you prefer and any color. I used a vanilla scented block that I shaved into the melted wax.

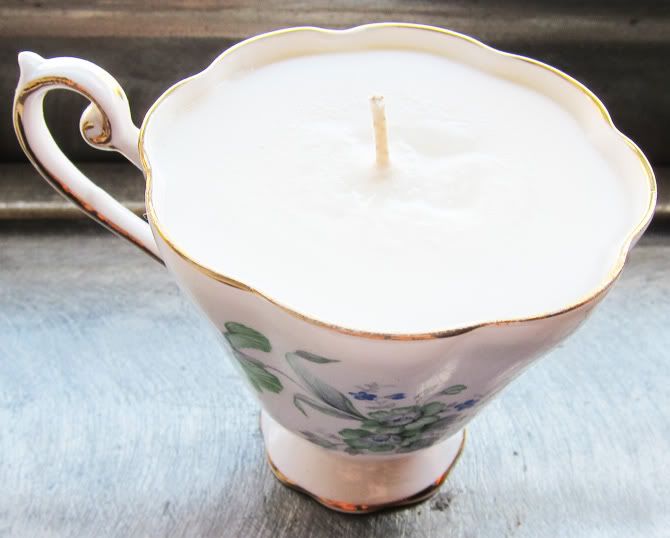
Allow the wax to cool to 135-140 degrees Fahrenheit (or lower depending on the wax you use). Pour the wax into the tea cups keeping the wick centered.

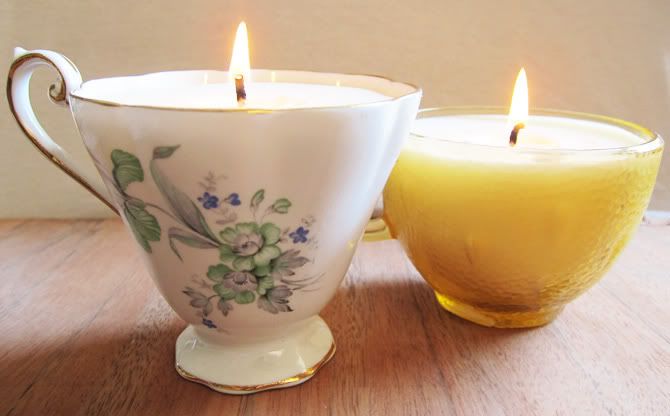
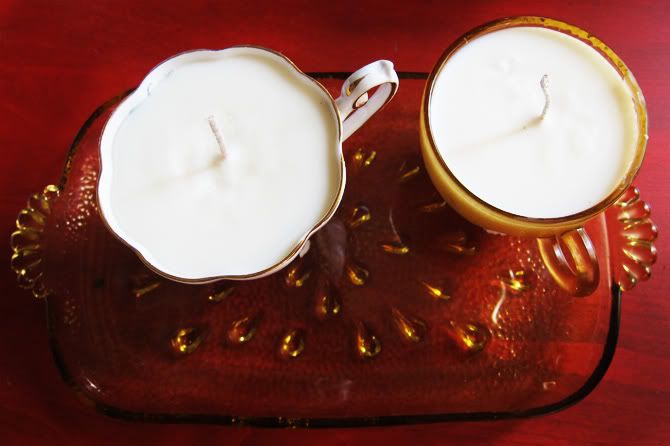
Wait for the wax to cool and cut the wick down to about 1/4 inch.

They would also look great at baby showers, tea parties or even just a little extra light when you are enjoying your favorite book.

7 Comments:

Blogger sarah said...

Love you. I am doing a handmade Christmas this year and guess what all the grandmas, aunts and girl cousins are getting? LOVE LOVE love it!!!

October 19, 2011 at 6:53 AM  
Blogger angela said...

love it! thanks for the idea!

October 19, 2011 at 7:22 AM  
Blogger AstaD said...

It's been some time that I can't seem to be able to see pictures in your posts (ads on the sides are fine). I still read contents but would love to see pictures too. Soemtimes I cansee some pictures, it seems to be the ones you've borrowed/linked from other places. If you know what I could do to change that I would appreciate your input. Thanks!

October 19, 2011 at 7:34 AM  
Blogger Unknown said...

I made over 200 soy candles for my wedding! We use a pair of chopsticks with rubber bands on each end to hold the wicks straight. Also, we used the microwave to melt the wax, but sometimes we got bubbles or rippling in the dried wax, so maybe that wasn't such a good idea, but most of them turned out great! We just used a heat embossing tool to smooth out the tops.

October 19, 2011 at 9:07 AM  
Blogger beccha said...

Love the project, just one question... how do you remove the wax from the bowl? I used a Revere Ware pan to melt wax once for something and never got it off...
Thanks!

October 19, 2011 at 10:39 AM  
Blogger Unknown said...

@beccha - if you're using soy wax, it'll wash right off with soap and water!

October 19, 2011 at 1:06 PM  
Blogger Jenna said...

You can also use old soup cans, coffee cans or the biggest cans you can find, to melt the wax before pouring into a mold. This way none of your pans get ruined in the process!

October 20, 2011 at 11:17 AM  

Post a Comment

Subscribe to Post Comments [Atom]

<< Home