How to Sew a Crayon Roll

The crayon roll may not be a new idea, but it is a good one! I whipped one up during nap time as a birthday party gift, delivered along with a coloring book. I made a few more as little stocking stuffers for the nieces and godchildren in my life. Easy-peasy.
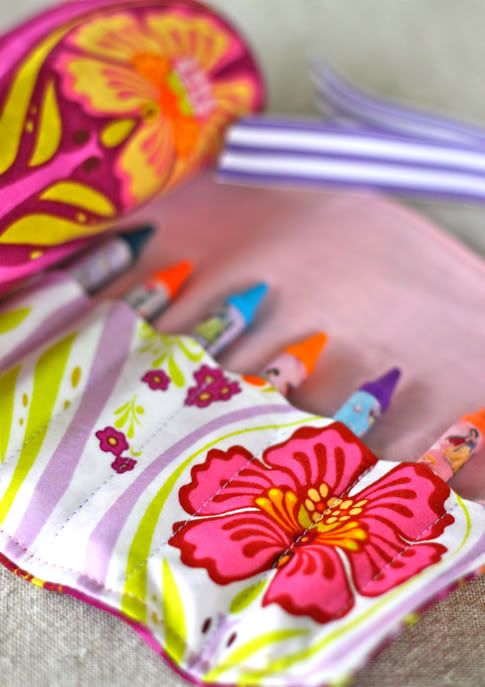
In a different set of fabrics, one of these babies would make a perfect boy gift as well.
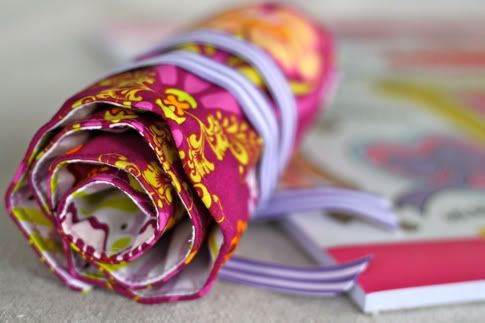
Get the full Crayon Roll Tutorial after the jump...
And remember to leave a comment for another chance to win this week's surprise prize, that Alexander Henry fat quarter!
How to Sew A Crayon Roll
Aren't these fabrics pretty? Part of my latest stash from Fabricworm. The pink is Patricia Bravo Dreaming in French Femme Fatale Dark, and the white background is Patricia Bravo Dreaming in French Femme Fatale Light, and the solid is Robert Kaufman Pure Organic Solids Pink.
So cut your fabrics. You need 3 rectangles 18"X6". One for the outside, one for the inside and one for the crayon pockets. I also used a piece of interfacing the same size for this one, but I made another one using batting instead of interfacing and that worked well also.
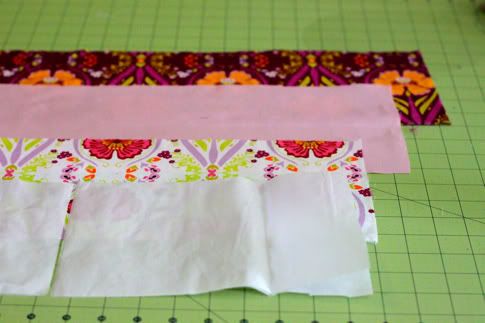
Iron your interfacing to the wrong side of the outside piece of fabric.
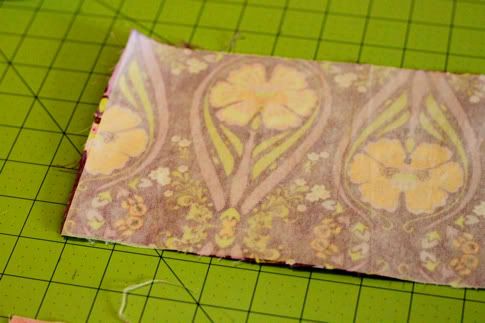
Decide which piece is your pocket fabric and iron that in half, wrong sides facing then align the unfolded edge with the bottom of the lining piece:
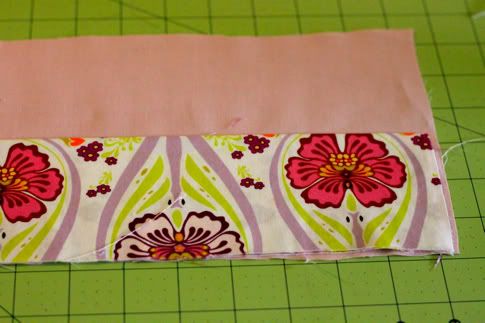
Sew straight lines 1" apart to attach the pocket piece to the lining piece.
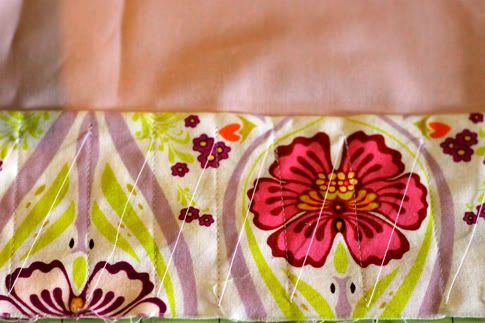
Then cut your threads.
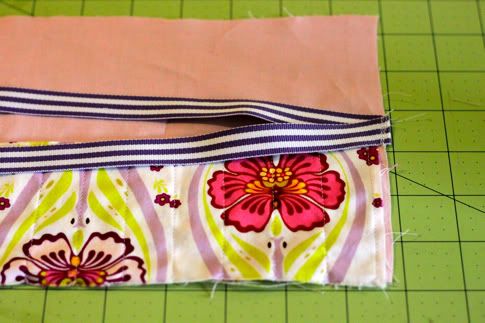
Take a length of ribbon (about 18" is nice and long) and fold it in half. Sew the folded edge onto the center of one side of your crayon roll, on the top edge with the length of ribbon to the inside:
Take your outside piece and pin it on top so right sides are facing:
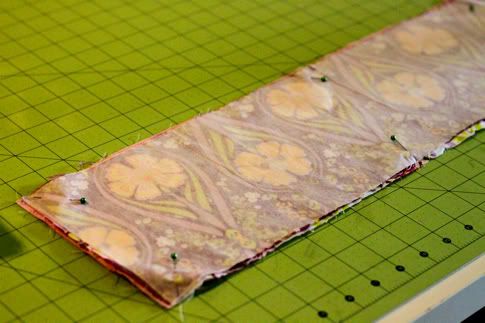
Sew in place all the way around, leaving a 3" hole for turning, back stitching at the beginning and end:
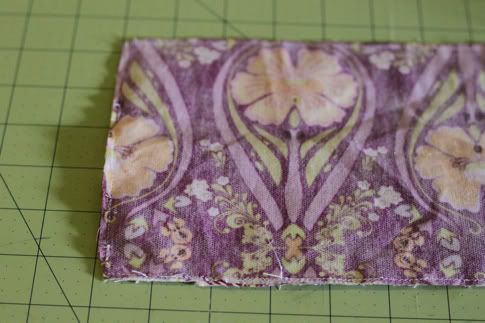
Reach in the hole and grab the ribbon and pull it to turn right side out:
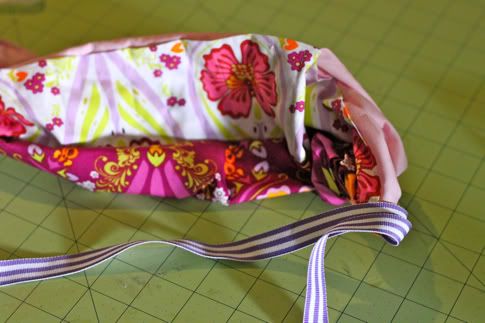
Push out the seams and corners and iron it flat:
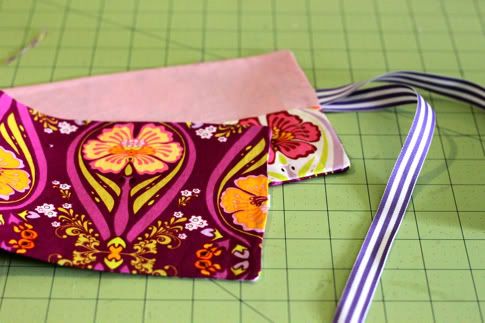
Top stitch all the way around at the edge (this will close your turning hole) and stuff with crayons:
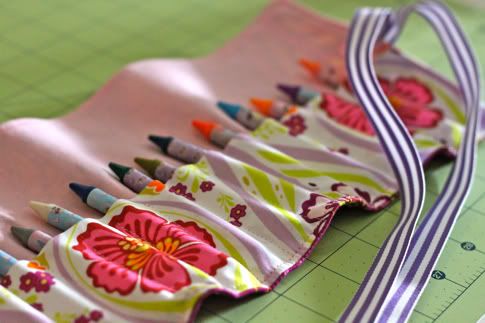
Roll it up and tie a bow!

Gift it with a pretty coloring book.
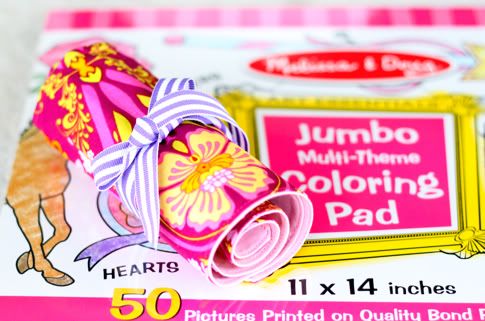
Fun! I did a version with batting and instead of just sewing the crayon pockets, I sewed straight lines from the top to bottom, essentially quilting the roll, and it worked really well. What do you think? I love crayon rolls but I think I'm going to have to whip up some Crayon Aprons too!
Labels: All Things Boy, Art, Gifts, In One Evening, Kid Activities, Kids, Organization, Sewing, Toys, Under $5

37 Comments:
I love the fabric. . . and anything that can be completed at naptime! I would love to make a couple of these out of that fat quarter of Alexander Henry Merry Main Street. Wouldn't they be perfect paired with some Christmas coloring books?
I made 5 of these this weekend to give as Christmas presents. Every kid needs one!
great stocking stuffer for the little ones! (and the big kids. may just make a grown up version for me :)!
so so cute. I love the fabric choice! definitely on my list to make for Christmas!
I made these a few years ago for my son and his friends. They are perfect for the diaper bag/purse/backpack when going to a restaurant or getting on a plane.
I used dinosaur fabric, flannel, and dog fabric. One of the key things I learned was not to use a thinner white cotton as the crayons mark it all up.
My dimensions are a little different, but these are my go-to gift for the preschool set. I guess I'll have to come up with something else soon once everyone we know has one.
My favorite preschool gift too! I make an apron and put washable markers in instead of crayons.
Crayon rolls are on my list today! They are sooo fun!
these are awesome! I have seen several tuts on these...but yours is the by far the easiest to understand! I finally "get" how to do it!:) thanks! I am making them after my tot goes to bed. I have a sweet neighbor girl who needs this!
Also!!! I made a mini version of the table runner last night...literally in 30 minutes! It's about 8"x15" and has rickrac! I'm so pumped!
I love these! I already made one for a birthday present! I am going to make 2 for my kids for Christmas! And I need to make some coloring books too!!!! I love your site!
that is a really great idea!love it!i am making all gifts this year and still needed soem ideas.thank you!
love the fabric too!
What perfect timing - it's almost eerie! This is on my to-do list for my three nieces. Thank you so very much - great instructions. Here I go!
I just made a bunch of these for boys. They turned out great too! I even modified one to fit 24 crayons in two rows.
I have been meaning to do one of these for a while now, and this looks so much easier than the others I have seen! So great!
Brilliant! I was thinking through the mechanics of this the other day, but for a toy car roll up "garage" of sorts (for my little girl nonetheless! Girls drive cars too!)... I'm gonna use your instructions, less thinking for me! Yay more brain cells for the little one on the way!
Cute and easy!
That is a great idea for an easy Christmas gift. I know my little girl would love one. Thanks for the tutorial.
i just bought some of these on etsy for stockings! i cant picture the one with the batting, and i want to see it to understand. and i dont know what interfacing is. help. please :)
i would like to make some myself for sure... i love the customabilityness
good job! go team!
What a great idea! Great fabrics too. Now if I could just find those princess crayons...
Great stocking stuffer!
Just gorgeous and i love the fabrics you've used.
Your fabric choices are always so beautiful. I feel like you've both got that "eye" or something. I wonder if you could do a tutorial for us about picking fabrics. Because sometimes I feel like that's where I'm really lost -- standing in the fabric store or looking online! How do you know what print to pick for what project, or what will work well together, or even what weight of fabric to use? I know there are probably no "right" answers to those questions but I'd love your insight!
Wow, thank you. I was just thinking of trying to figure out how to make some for gifts, and now I don't have to. :)
so cute! I need to try this one:)
I'm making my son one of these crayon rolls! Thanks for the instructions! Awesome!
Thanks for the tutorial. I think this would be a great gift, I'm putting this in my Christmas gift folder for next year to make for all the little kids on my list. This would make a good project for January or February! Just think, actually getting Christmas gifts completed months early. Heaven!
OMG! Those crayon rolls are soo cute! All I need is someone to pop out some youngin's so that I can make them some. (my kids are somewhat past that age to appreciate this). I think I'm gonna make one just to make me happy. Maybe I will use it in the morning for my lip liner, eye liner, and make-up brushes. (hehe)
I wonder if this could be adapted into a coloringbookfolio thingie. One side, crayons nuzzled in their little pockets, the other side a larger pocket for coloring books... a ribbon with velcro to close it all and a handle to carry it. Hmmmm.... We are driving from NC to FL Christmas day so these might come in handy. Thanks for the inspiration!
Perfect timing! This is on my to-do list for the weekend. Love the PB tutorials. Your succulent wreath is also on my to-do list. I heart you ladies!
How wash-able is this ? Im thinking with some tweak to the dimensions, this would make a great way to roll up makeup brushes ? (or even kids paint brushes, possibilities are endless ) but... I would htink if you used make up brushes, you would want to be able to get it clean ? I went to the fabric store today to buy the interfacing, seriously had no idea there were so many kinds !
IM gonna make this for my nephews and nieces! Love it, thank you!!
Thanks so much for this tutorial. It was my first real project when learning to sew. I posted about it on my blog (http://sewingnovice.com/2011/01/19/my-first-projects-crayon-roll/).
I love the pretty fabric and ribbon on this! And I'd love for you to submit it to the M&T Spotlight at http://www.makeandtakes.com/spotlight
My bff and I are totally going to try this - and we'll post on our blog when we do and let you know: www.wom-mom.com
Love all of your projects, and your can-do attitude! I'm no expert, but this would probably work as a cute make up brush roll. (Maybe some mesh zipper/velcro pockets for some make up too. :) ) I will be coming back to this once I have the materials and time. Thank you!
I just made 7 crayon rolls using the pleated poppy tutorial...both of your tutorials are alike...but I love the ribbon idea for a girl.
Lovely tutorial! I'm including this in my "Gifts for Girls" post. :)
Aloha,
Charlie
Post a Comment
Subscribe to Post Comments [Atom]
<< Home