DIY Diaper Cover Tutorial with Free Pattern!
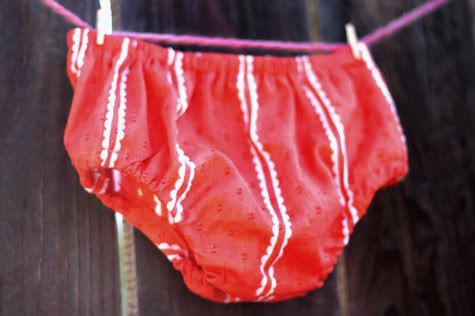
Why is it so impossible to just buy a diaper cover? Why?? If they sold them, say in packs of three in various seasonal colors, would we not purchase them? I don't understand it, and neither do our readers, judging by the number of emails we get asking for a pattern. Your wish is our command...

Get the DIY for the matching Sweet Shirred Summer Dress here, and the full tutorial and free Diaper Cover Pattern after the jump...
DIY Diaper Cover
To sew this diaper cover, you'll need our Diaper Cover Pattern and 1 length of 3/8" thick elastic for the waist, and 2 lengths of 1/4" thick elastic for the leg holes. This pattern fits about 18-24 months depending on the size of the booty you are working with. I used a piece of 3/4" elastic 18" long for the waist and 2 pieces of 1/4" elastic 11" long for the legs (you can measure the waist and leg circumference and add about 2.5" to get your specific measurements). For a smaller baby you can use the same pattern and smaller lengths of elastic and just have a poofier diaper cover, or you can shrink the pattern. As with any pattern, double check your print settings to make sure they are not set to "shrink to fit". The fabric here is the almost-sold-out Anna Maria Horner Dobby Voile Pastry Line in Coral (which is 15% off along with ALL Anna Maria Horner fabrics at Fabricworm right now, eek!)
1. Pre-wash and iron your fabric, then download, print, and cut out our diaper cover pattern:
Diaper Cover Pattern - Front
Diaper Cover Pattern - Back
2. Trace the pattern onto your fabric and cut out:
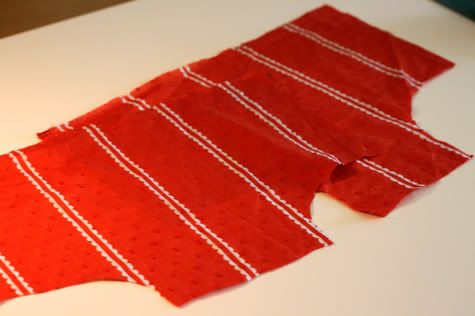
3. Pin the two pieces right sides facing along each side edge and the bottom (crotch) edge. They won't line up flat as the back is bigger then the front, so it'll look like this when you pin:
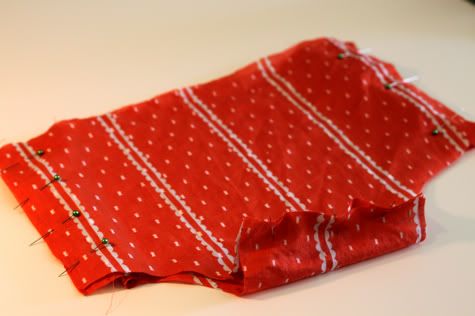
3. Sew together along the three edges with a straight stitch and 5/8" seam allowance, then finish the edge by serging, sewing with a zig zag stitch, or cutting with pinking shears:
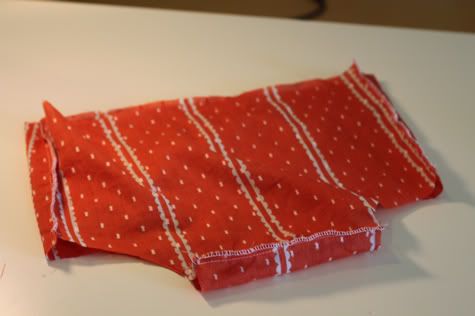
4. Create the waist casing by folding the top edge under 1/2" and ironing, then another 1/2" and ironing. Sew in place, leaving a hole to feed your elastic through near one side seam, back stitching at beginning and end:
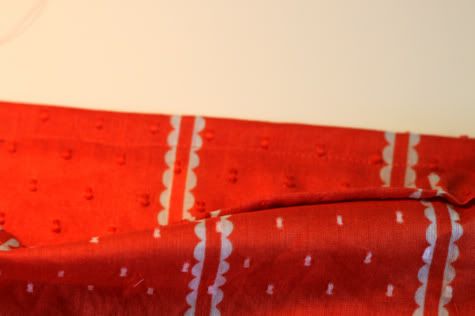
5. Create your casing on one leg hole, this time only folding in 1/4" and ironing, and another 3/8" and ironing, then sewing in place leaving a hole to feed your elastic through:
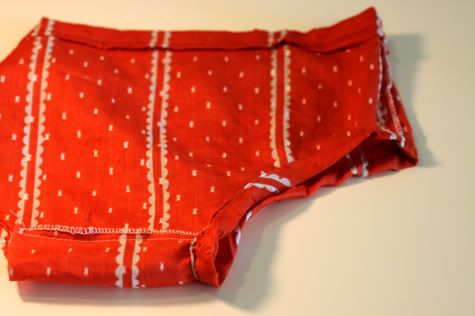
Repeat on the other leg:
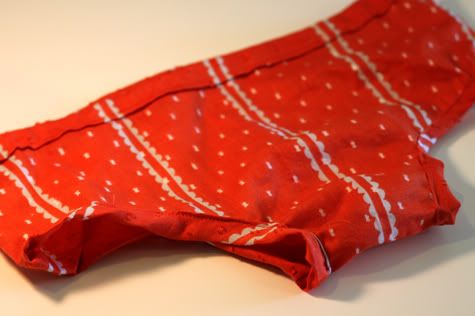
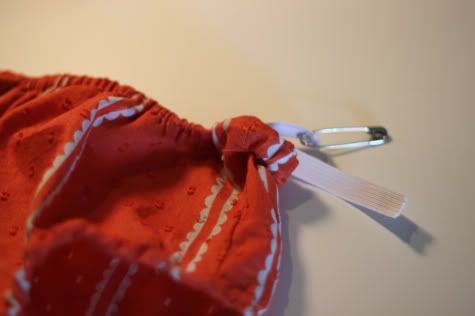
6. Use a safety pin to feed one piece of your 1/4" elastic through one leg hole:
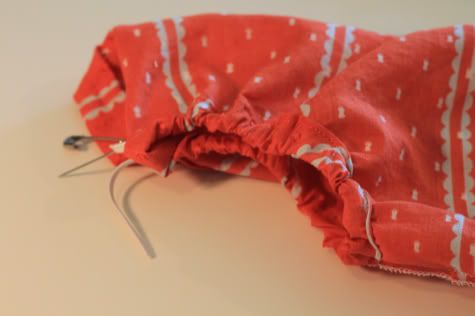
Overlap about 1" and sew together flat:

Push the elastic back into the casing and sew the hole closed:
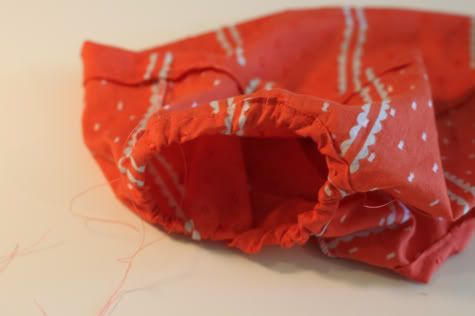
Repeat on the other leg:
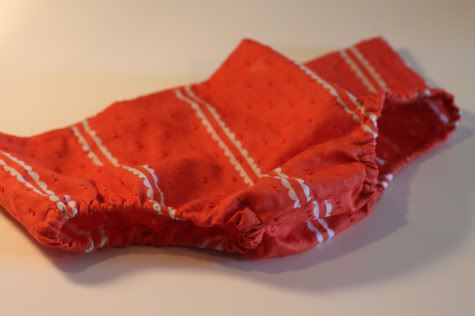
7. Repeat on the waist, this time using your 3/8" elastic:
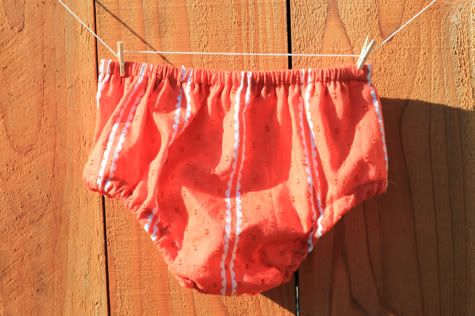
Done!
Labels: Baby, Clothing, DIY, Gifts, Kids, Sewing, Templates, Under $5, Under an Hour

36 Comments:
Love it! Thank you so much!!!
Love it... with ruffle butt would be awesome!
We searched high and low for these as well - so now we have our own brand called Playpants Modern Bloomers www.playpants.ca
And we have those ruffles you're looking for too :)
Lovely! This is a great tutorial. I'm excited to try it!
Thank you! Thank you! Thank you! I've been searching for one of these!
I've been looking for a tutorial for these, of course you guys are the ones to come through for me. love love love this site!
Thank you so much for this! I have so many dresses that I want to make for my daughters and always like diaper covers to match.
Thanks! I'm pregnant with our first and we're planning on doing cloth diapers. I am going to try your tutorial with a PUL liner!
This is a great project. It's always nicer to cover up an ugly old diaper with something cute!!
Thanks!!!
Hi! I recently found your site and I am in heaven!! This is an awesome post, however I need help. If the printer doesn't need to be on "shrink to fit" what setting should it be on?? Should I know this?? lol
Bloomers! So cute. I'm going to miss this fabric so much when it's all gone. It is so luxurious and beautiful!
Thank you so much. It drives me crazy when they sell dresses without the matching diaper cover (plus I knew it would be easy to make). I thought I was the only one that hated seeing my daughter's diaper peeking out from under her pretty dress!!!
Quick and easy! Love it! Just realized the dress I made for my daughter to wear to a wedding is a tad too short. I've been fretting finding time to make a matching cover...now I don't have to fret! Thanks!!
I will have to try this. The pattern I use now looks like it takes up a lot more fabric compared to yours here. I just use what came with a pattern I bought awhile back.
Thanks amy
thank you! I hate making these cause I never had a good pattern, but these look so simple! I'm definitely going to have to try some of these for dresses I've made recently. Oh, and I love that your daughter is the same size as mine-the patterns are perfect! :D
I LOVE this site!!!!!! Thank you for, well, everything! I am dying to learn to sew and your projects are lined up in my head.
My current favorite craft is crochet, which leads me to ask: is there a pattern for the adorable sun hat? I would love one for me! :)
thanks everyone!!! and annapk...how to get that sunhat = purchase at baby gap :)
Thanks! I made one yesterday. I still have to try it out on the baby, but it looks good.
http://craftytalk.wordpress.com/2010/06/05/mushroom-diaper-cover-pants/
Thank you very much for this tutorial ! I will try to make it next week-end... I have already made a sarouel in same spirit (http://lesideesdedaphne.blogspot.com/) ;-)
This is great! I have been looking for a pattern for a long time. Thanks! By the way, what size are these do you think?
Lisa
you can make diaper by yourself ,this blog provide all important information which is necessary for making a diaper . so you can also use one size diapers .thanks..............
Just finished mine, and added three ruffles to the back. So easy (even though I am TERRIBLE at elastic usually). Made a coordinating embellishment for a tank to go with it--PLAYCLOTHES!
I love this tutorial, but the pattern has been archived by Scribd, so I can't download to resize it. Is there any way you could move it to Google Docs?
Hi Catherine - This pattern has been moved and is now accessible. Please let us know if you have any more problems! And thanks for letting us know!
I just made one for my little boy to wear in his 1 year smash cake pictures. I'll be sure to send you the link to my blog post about it. Thank you so much for the pattern. I tried to just create one myself and it wasn't nearly as good!
LOVE it! You make it look so easy!!! I love your whole blog!! I am doing a linky party tomorrow if you want to link up!!
The patterns don't print the whole thing unless you do borderless printing. :o)
How much fabric do I need to get to make this?
Love this! So easy to follow - wish I'd found it sooner, I made my own version but would have found your pattern very handy!
http://kyromaniac.blogspot.com/2010/11/creativity-gone-wild.html
I just made a pair of these today. They are so cute and easy. You rock.
THANK YOU! Why is it so hard to find diaper covers? Why would a company sell a toddler dress without it? We may never know.
I love the simple but I am wondering if the back and front of the pattern are labeled wrong? My pattern marked back is smaller than the pc. marked front. Easily to correct but thought you might look at it. I am adding a monogram to the zebra print material I am using and using hot pink against the black and white fabric....a tutu in white, hot pink and black and a white shirt with a matching cupcake for a 1 year old birthday. Thanks for sharing the pattern.....wonderful!
I couldn't prin t the pattern!!!! I am so looking forward to trying these!!!!
SO excited to find these, I plan to make 3 and include them with those crib quilts I have been churning out this year. everyone is pregnant! Everyone!
How do I adjust this pattern for it to fit other sizes... i need a 12 month pattern. I tried cutting this pattern in half and I made a doll diaper cover LOL
This is GREAT! I am about to make a bunch of these to take as a donation with me to the Democratic Republic of The Congo, when we go to pick up our daughter!
Post a Comment
Subscribe to Post Comments [Atom]
<< Home