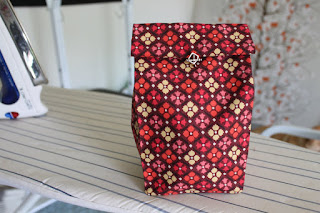
DIY Fabric Lunch Bag!
A custom fabric lunch bag takes 20 minutes, is adorable, and you can make one to match any outfit. These are fantastic thoughtful gifts (or gift wrapping) too. And they cost virtually nothing - you'll even save money (and trees) on paper bags.
Get the DIY after the jump!
1. Cut your decor-weight or canvas fabric, a spare quarter yard works well. I used a bright Denyse Schmidt County Fair leftover that appears to be sold out, but some other fabrics from that collection are available at fabric.com while more amazing home decor weight prints can be found at Hart's Fabric. You can cut two 13X9 pieces and with wrong sides facing sew three sides (leaving a short side open) with a straight stitch, or like me you can take one 26"X9" piece, fold it in half with wrong sides facing and sew the two long sides together:
Then hemming in place with a straight stitch:
3. Now you are going to create your gusset. Turn the bag inside out and bring the seams front and center and flatten the resulting fabric into a point:
Then fold one side down so it's in a diamond shape and iron it flat:
4. On each side of your diamond shape measure 2 inches down from the point and draw a straight line with a washable marker. Make sure they are even otherwise your gusset will be wonky:
5. Sew a straight stitch along each line, then cut off the triangle of excess fabric:
so you are left with this:
6. Now turn your bag right side out, poke the corners out so they're flat, and fold into a lunch bag shape and steam iron so it has crisp seams:
7. Stand that baby up and admire it, then fold the top over a few times and iron some creases into it so you can figure where to put your closing attachment
8. Now you can leave it like this or put some sort of closing mechanism. I've added buttons or velcro, but this time I decided to use an old bracelet clasp. Mark the spot in the center of the fold and corresponding spot on the actual bag with a washable marker (it's important to get them centered or your bag will fold funny). Quickly hand-sew each side of your clasp in place:

You're done! So easy and so cute. Scarlet's daycare teachers and even my husband always enjoy these quickie lunch bags. I can't wait until she's old enough to request specific colors and patterns!

Here are some other cute DIY lunch bag projects I've seen:
-Embroidered lunchbag from PurlBee
-Kate's notebook lunchbag on DesignSponge
-Oilcloth lunchbag at SkiptoMyLou
-Zippered top lunch bag at Craftzine
Labels: Gifts, Kids, Party, Sewing, Under an Hour


5 Comments:
Saw your nursery on Kenzie Poo and Made By Girl. Great job!!! And I love all of your DIY's!
That is such a beautiful fabric, and you did this really well
I love the idea of this!
Now, I just need to work out how to make oilcloth sandwich wrappers, so I can send a complete non disposable lunch bag with the husband and 4 kids each day!
i made this today! woot!
Just made two! Love them....but mine seem a bit small. I think I may need to sew a bit closer to the edge. Thanks for sharing!
Post a Comment
Subscribe to Post Comments [Atom]
<< Home